How To Set Up A New Pocketbase Project
Do you want to learn how to set up a new Pocketbase project? In this guide, we will learn exactly that. We will first set up Pocketbase itself, configure it, and then create the tables needed for the expense tracker.
This is the first part of my free Pocketbase course, check the introduction and a list of all posts here.
- Set up a new Pocketbase project
- Configure the new Pocketbase project
- Create the needed tables
- Conclusion
Set up a new Pocketbase project
Before we start to set up a new project we will create a new project directory and in this directory, we will create a directory called backend. Finally, enter the backend directory.
expense-tracker/
└── backend/
Now to create a new Pocketbase project download the newest version here. You can also call this command and just change it to the newest version.
curl -L https://github.com/pocketbase/pocketbase/releases/download/v0.18.10/pocketbase_0.18.10_linux_amd64.zip -o pocketbase.zip && unzip pocketbase.zip && rm pocketbase.zipTo start Pocketbase you have to call the binary with the serve command like this:
./pocketbase serveYou can now open your browser under http://127.0.0.1:8090/_/ to find the installer. Here you have to create your admin account.
Configure the new Pocketbase project
Now that we created an admin account we will land on the main UI for Pocketbase. Here we can create tables, records, and so on. Additionally, on the left sidebar, we have a settings button and we will click on it now to complete the configuration.
If this guide is helpful to you and you like what I do, please support me with a coffee!
The first thing we see here is the Application tab. Here change the Application name to Expense Tracker.
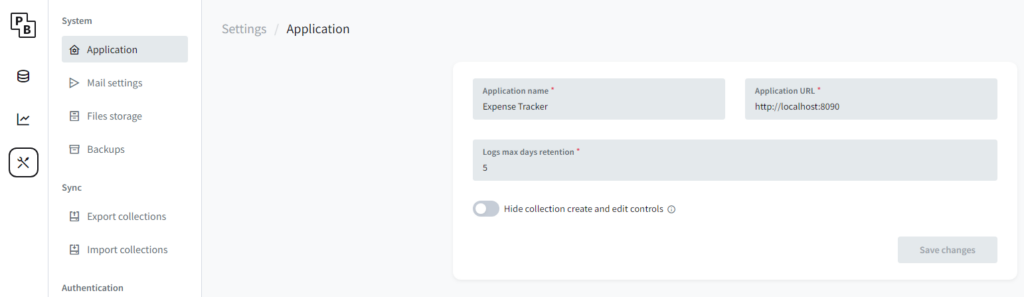
Next, we go to the Mail settings. In this tab, you can set the sender, and sender address and modify the templates. For me sending a mail with sendmail did not work, therefore I set up an SMTP using Brevo. You can follow this guide here to do the same.
We will skip the sections on file storage and backups, as they will be relevant when we release a production build of the application and not before that.
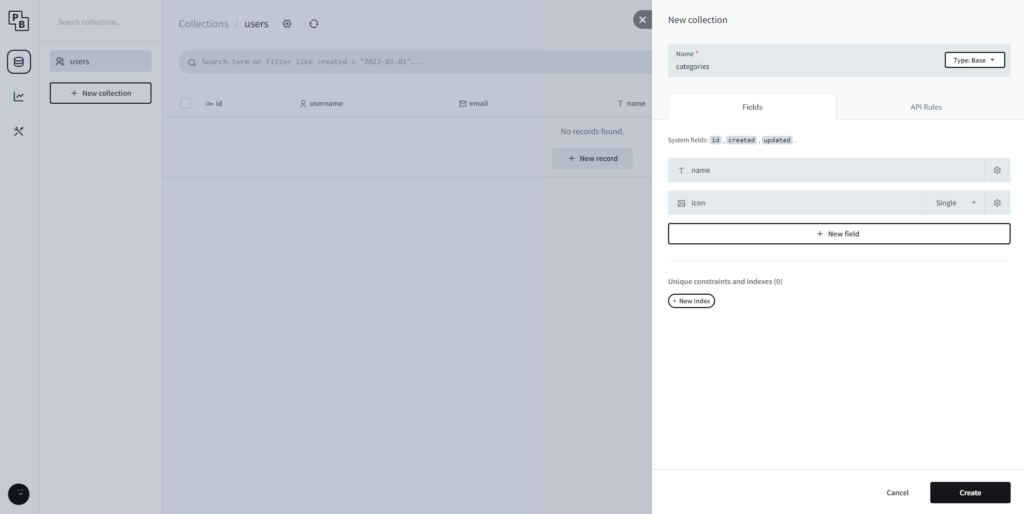
Create the needed tables
Now we will go back to the collections tab and click on the button “+ New collection”. We will call it categories and create two new fields called “name” and “icon”. They are of the types “plain text” and “file”. After that, we will click on create to create the collection.
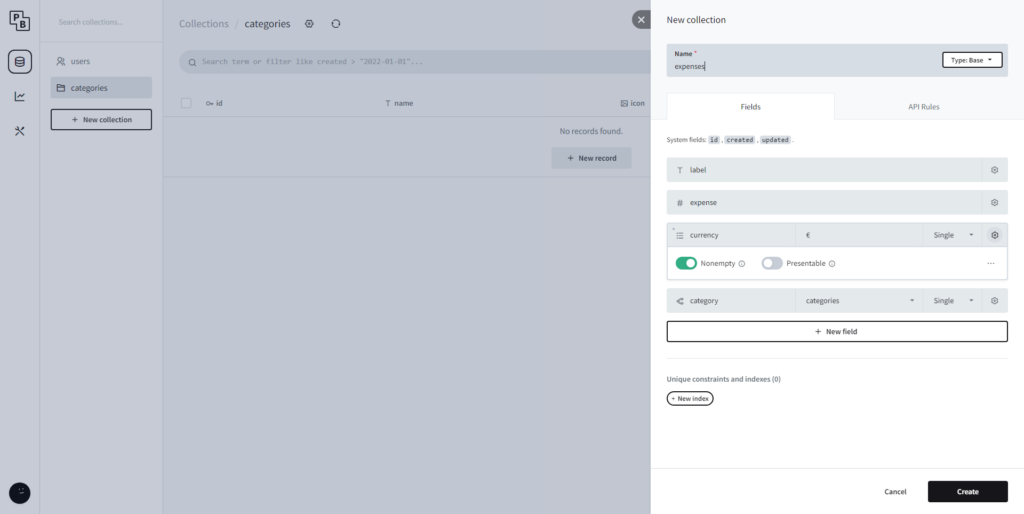
Next, we will create the expenses collection with the fields “label”, “expense”, “currency” and “category”. The types of these fields are “plain text”, “number”, “select with the option €” and the option nonempty, and finally a relation to the categories collection.
For testing purposes you can also create a first category and expense by going to the collection and clicking on “+ New record”.
Conclusion
With that, we have set up the basis for our expense tracking application. Easy wasn’t it? In the next steps, we will use this foundation to build the actual application! I hope you liked the course so far. See you in the next part!
In case you have any questions feel free to ask them and if you want to stay up to date with all my posts consider subscribing to my monthly newsletter!
[convertkit form=2303042]
Discussion (0)
Related Posts