How To Build A Chrome Extension with SvelteKit (Step-By-Step)
Do you want to build your very own Chrome Extension using SvelteKit? I was curious too, and in this guide, I will share with you how to build a Calculator extension step-by-step! We will first set up the project. From there, you can either build your own extension or follow along by building a simple calculator.
In the last post, we build the same extension using vanilla HTML and Javascript. In case you find that more interesting, check it out here.
- Set up a project to build a Chrome Extension with SvelteKit
- Build the calculator as a popup Chrome extension with SvelteKit
- Use Chromes storage API to persist the equation and result
- Conclusion
The following GIF shows the final extension:
Set up a project to build a Chrome Extension with SvelteKit
To set up the project, we will start by creating a new SvelteKit project and then adjusting it to work as a Chrome extension with the following steps:
- Set up SvelteKit:
pnpm create svelte@latest calculator-extension-sveltekit - Enter the directory and install all packages:
cd calculator-extension-sveltekit && pnpm install - Then install the adapter:
pnpm install -D sveltekit-adapter-chrome-extension @types/chrome - Create a
manifest.jsonwith the following content in thestaticdirectory
{
  "manifest_version": 3,
  "name": "Calculator Extension",
  "version": "0.1.0",
  "description": "My Chrome Extension",
  "action": {
    "default_title": "Calculator Extension SvelteKit",
    "default_popup": "index.html"
  },
  "permissions": [
    "storage"
  ]
}- Adjust the adapter in
svelte.config.jsto:
import adapter from 'sveltekit-adapter-chrome-extension';
import { vitePreprocess } from '@sveltejs/kit/vite';

/** @type {import('@sveltejs/kit').Config} */
const config = {
    preprocess: vitePreprocess(),
    kit: {
        adapter: adapter(),
        appDir: 'app',
    }
};

export default config;- Create
src/routes/+layout.tswith the line:export const prerender = true;
For development, you can run it inside the browser as a normal web app using pnpm dev. As soon as we want to install it as an extension, we need to run pnpm build. Do so and follow the next steps to install it in the browser:
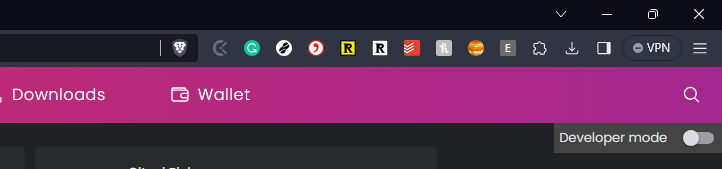
- Open
chrome://extensionsin your Browser - Enable dev mode:

- Click on “Load unpacked”
- Load the build directory as a Chrome extension.

Using pnpm dev has the benefit that it is super fast and has HMR, as we are used to with normal SvelteKit. Sadly we cannot use the different APIs provided to build Chrome extensions inside SvelteKit. Therefore we will install nodemon and set it up for auto-reload when we change something. Follow these steps:
- Install nodemon:
pnpm install -D nodemon - Add the following script to the scripts object in the
package.json:"devext": "nodemon --watch src --watch static --exec \"vite build\" -e json,ts,css,html,svelte" - Now continue developing by running
pnpm devextand you can also use the APIs
Build the calculator as a popup Chrome extension with SvelteKit
First, we will update the src/routes/+page.svelte with the following code. It is basically only a text field and a text for the result. Additionally, we also import picocss for a style and popup.css to define the size of the window:
If this guide is helpful to you and you like what I do, please support me with a coffee!
<svelte:head>
    <link rel="stylesheet" href="https://cdn.jsdelivr.net/npm/@picocss/pico@1/css/pico.min.css">
    <link rel="stylesheet" href="popup.css" />
</svelte:head>

<script lang="ts">
    let value = '';
    let result = '';

    function select(this: HTMLInputElement, event: Event) { this.select() }
</script>

<div class="container">
    <h1>Calculator</h1>
    <form on:submit|preventDefault>
      <input type="text" placeholder="1 + 2" bind:value={value} on:click={select} />
    </form>

    <p>{result}</p>
</div>
The select function will select all the content of the input element. For popup.css create a new file in the static directory with the following content:
body {
  width: 350px;
  height: 300px;
}
Lastly, we will create the calculator logic. For that, we will first install the module mathjs by running pnpm install mathjs. And then add the calculate function to the script tag:
import { evaluate } from 'mathjs';
function calculate() {
    result = evaluate(value);
}
In addition to creating the function, we also have to call it inside the form element:
<form on:submit|preventDefault={calculate}>With that, we have a working calculator extension, but every time we close the window, the equation and result are lost. Therefore we will use the storage API to persist both.
Use Chromes storage API to persist the equation and result
To do so, first, make sure that the “storage” permission is available in static/manifest.json and if it is not, add it.
{
...
    "permissions": [
        "storage"
    ]
...
}
We will store both the equation and the result. Therefore we need to adjust the calculate function to the following:
function calculate() {
    const res = evaluate(value);
    result = res;

    chrome.storage.local.set({ equation: value, result }).then(() => {
        console.log("Value is set to " + result);
    })
}
Next, we need to load them whenever the window is opened. To do so, we add the following code to the end of the script tag:
import { onMount } from 'svelte';
onMount(() => {
    chrome.storage.local.get(["result","equation"]).then((store) => {
        const eq = store["equation"];
        const res = store["result"];

        value = eq ? eq : '';
        result = res ? res : 'Result';
    });
})
Conclusion
With that, you learned how to build a popup Chrome extension using SvelteKit and with the example being a calculator app. We learned how to add scripts, CSS and use the storage API. You can find the whole extension in GitHub here.
I hope it was helpful to you, and if you have any questions, just ask!
If you liked it consider subscribing to my newsletter!
[convertkit form=2303042]
Discussion (0)
Related Posts