How to create a blog with Svelte step-by-step
Is your website unperformant? This guide helps you to create one with perfect lighthouse score!
With Svelte you can use your knowledge in HTML, CSS and JavaScript to populate your site with dynamic content.
What is SvelteKit?
SvelteKit is a framework for building different kinds of applications and it follows an intuitive developer experience. The foundation of SvelteKit is based on two basic concepts:
- Every page is a Svelte component
- Routes are handled by a filesystem-based router
Components allow every page to be created by splitting its contents into multiple Svelte files. By doing this you get the opportunity to reuse components multiple times both in your current application or in others.
The filesystem-based router creates a more intuitive workflow than having to set up the different routes yourself. To clarify, a route is a point that a user can reach on your website that is appended at the end of your domain in the URL, and might look like this: www.website.com/posts/example-post.
Another benefit of the filesystem-based router is that it is really easy to create API endpoints. An endpoint can be used to request data from the server (e.g. to get a list of all available blog posts).
The router differentiates between pages and endpoints by looking at the file extensions. .svelte is used for the pages and .json.js for the endpoints.
Steps
Now I will show you how to use SvelteKit to create your blog in markdown, an easy-to-read and write format.
Here are the steps you need:
- Setting up SvelteKit
- Project structure
- Create the landing page with Svelte
- global.css
- Svelte components
- Layout
- Landing page
- Parse markdown
- Create a post card and display it for each post
- Create routes and load posts
- Build your site with the node adapter
- Get the perfect lighthouse score
Setting up SvelteKit
The first step is to create a project.
- Start the project with:
npm init svelte@next personal-blog- Choose the option ‘skeleton project’ and answer everything with ‘no’.
- Enter the folder and install the configuered packages:
cd personal-blog
npm install- Run your project in a development environment with:
npm run devTo find your example application head to http://localhost:3000 in your browser. You will find a webpage saying: “Welcome to SvelteKit”.
Project Structure
The next step for the project is to define the following structure:
If this guide is helpful to you and you like what I do, please support me with a coffee!
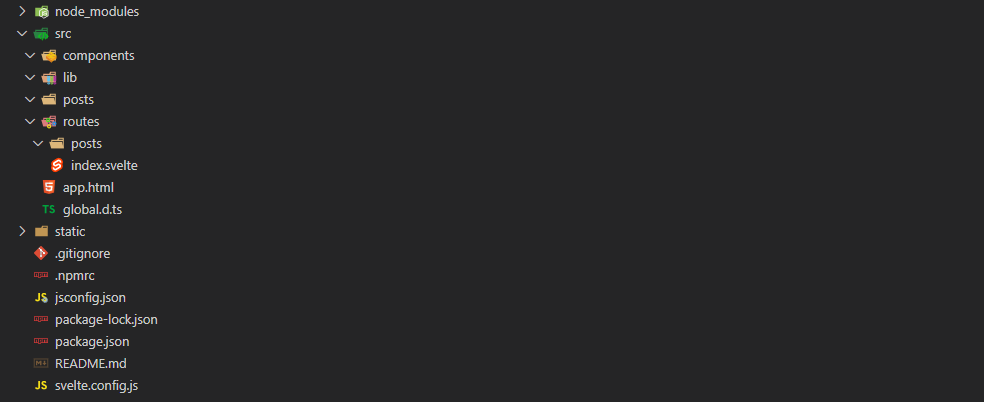
src/components/-> Components your pages are made offsrc/lib/-> Logic to build your pages from markdownsrc/posts/-> Markdown post filessrc/routes/-> Router with all available pagessrc/routes/posts-> Endpoints and pages for the route/posts/src/routes/index.svelte-> Landing page for/
src/app.html-> Template for every HTML pagestatic/-> Static resources, like images, that will be used in the website.
Create the landing page with Svelte
The landing page is defined in the file src/routes/index.svelte and is reachable under your URL with the route /. To personalize this page Svelte uses HTML, CSS, and JavaScript with the following structure:
<script>

// JavaScript

</script>

<style>

// CSS

</style>


//HTML
The first part contains the style of the component. To use the same CSS multiple times you need to create a static/global.css or a selector with the global modifier as explained in the next section.
The second part contains variables and functions that you can use. For example, you can manipulate the list of blog posts or give a component multiple values to use in the HTML.
The last part contains the HTML of your page and defines the layout. You can use all the different HTML tags, but you can also import different Svelte components and display them on the page.
With the different functionalities, you can create components and pages with ease. For a better understanding check out the section Svelte components.
The next subsections will lead you through a process of creating a landing page with a header that can be used on all pages, by using a layout.
global.css
There are two methods to create styles that you can use in every component. One way is to extend a selector with the global modifier: :global(...).
<style>
  :global(a) {
    /* this will apply to every <a> tag in your project */
    color: black;
  }
</style>
The other way is to create a global.css in the static directory and include it in the app.html file. This way the CSS will be imported like a normal stylesheet.
<!-- app.html -->
<!DOCTYPE html>
<html lang="en">
	<head>
		<meta charset="utf-8" />
		<link rel="icon" href="/favicon.ico" />
		<meta name="viewport" content="width=device-width, initial-scale=1" />
		<link rel="stylesheet" href="/global.css"> <!-- add this to import global.css -->
		%svelte.head%
	</head>
	<body>
		<div id="svelte">%svelte.body%</div>
	</body>
</html>
Svelte components
A component is a .svelte file that can be used as a page or in the HTML part of any other Svelte file. You can pass values to every component and use them in the HTML part. The following example shows how to pass a title to the PostCard component and how to use it.
<!-- page.svelte -->
<script>
  import PostCard from './post-card.svelte' //import the postcard component
</script>

<PostCard title="Hello"> //create a postcard with the title


<!-- post-card.svelte -->
<script>
  export let title; //make variable available
</script>

<h1>{title}</h1> //use the variable value
.
.
.
Layout
The layout component is a way to create elements that repeat on every page (e.g. a navigation menu for your website). By creating a __layout.svelte in the route directory, you will apply the defined layout to every page in this and every adjacent route. In case you want to remove the layout for a specific route you can create a __layout.reset.svelte file.
A layout component is a basic Svelte file that will be automatically imported by the router. On important part is that you have to include <slot></slot> tags. These define where the page contents should be included.
To read more about layouts and nested layouts check out the SvelteKit documentation.
Landing page
To create your landing page you have to edit multiple parts of your project, with the most important one being the /src/routes/index.svelte file. Further, we will create a basic layout and a global.css file.
<!-- /src/routes/__layout.svelte -->
<style>
    header {
        display: flex;
        justify-content: space-between;
        border-bottom: 1px solid lightgray;
        padding-left: 4vw;
        padding-right: 4vw;
    }

    nav {
        display: flex;
        justify-content: space-between;
        align-items: center;
    }

    h1 {
        margin: 5;
        font-weight: 400;
        font-size: 25px;
    }
</style>

<header>
    <h1>My Blog</h1>
    <nav>
        <a href="/">Home</a>
    </nav>
</header>
<slot></slot>
First, we create the __layout.svelte in the base route directory. This way every page will use this layout.
<!-- /src/routes/index.svelte -->
<style>
main {
padding: 4vw;
}
</style>
<main>
<h1>Posts</h1>
<p>Here we will place all the different blog posts</p>
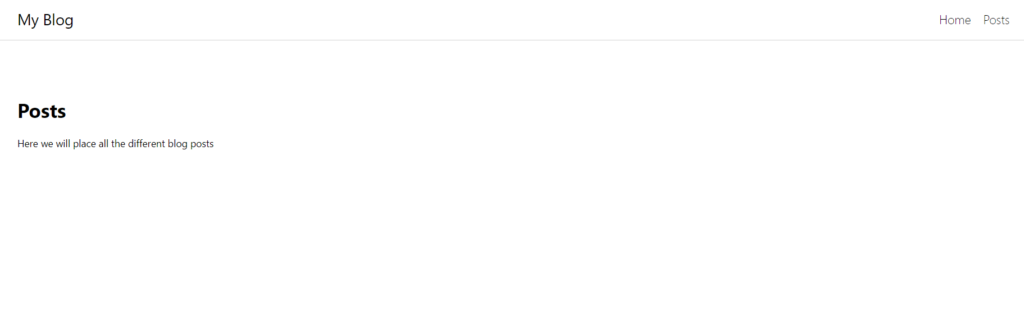
</main>Next, we modify the index.svelte to give the landing page the look we want.
/* /static/global.css */
body {
    margin: 0;
    font-family: 'Segoe UI', Tahoma, Geneva, Verdana, sans-serif;
}

a {
    margin: 0;
    font-weight: 100;
    font-size: 20px;
    color: black;
    text-decoration: none;
}

a:hover {
    text-decoration: underline;
}
Lastly, we create the global.css file and insert it in the app.html to create some global styles. After setting up the project basis we will continue with adding functionality.
Your current site should look like this:
Parse markdown
We will create posts by utilizing markdown. The frontmatter contains information about the post and will be displayed in a PostCard. The body contains the blog post itself and will be converted into HTML and displayed in a Svelte component.
Our frontmatter contains the title and a description for the post and has the following format:
---
title: title
description: description
---
We will create a file called handle-markdown.js in the src/lib directory. It will be used to find all posts, extract the frontmatter and parse the body to HTML.
For this we will use the following packages:
# glob: to import multiple files with a * syntax
npm install glob
# front-matter: extract frontmatter and body from markdown
npm install front-matter
# remark, remark-html, @mapbox/rehype-prism, rehype: For HTML parsing
npm install remark remark-html @mapbox/rehype-prism rehype
The packages will be used in two different functions. importMarkdowns(path) utilizes glob to get all posts in the specified path. With convertMarkdown(path) each post will be converted into a JavaScript object, containing the path to the file, the frontmatter attributes, and the parsed HTML.
//handle-markdown.js

import fs from 'fs';
// import files with pattern
import glob from "glob";
// parse front matter and body of markdown
import fm from "front-matter";
// parse body to html
import remark from "remark";
import html from "remark-html";
import rehypePrism from "@mapbox/rehype-prism";
import rehype from "rehype";

/**
 * import all markdown files in specified path, extract front matter and convert to html
 * @param {string} markdownPath path to folder containing the markdown files (ends on /)
 * @returns [{path, attributes, body}]
 */
export function importMarkdowns(markdownPath) {
    let fileNames = glob.sync(`${markdownPath}*.md`);
    return fileNames.map((path) => convertMarkdown(path));
}

/**
 * convert markdown to object with attributes and html
 * @param {string} path path to file
 * @returns
 */
export function convertMarkdown(path) {
    // read file
    let file = fs.readFileSync(path, 'utf8');
    // extract frontmatter and body with the front-matter package
    let { attributes, body } = fm(file);

    // parse the body to html with the remark/rehype pipeline
    let result = remark().use(html).processSync(body).contents;
    result = rehype().use(rehypePrism).processSync(result).contents;

    return { path, attributes, html: result};
}
Create a post card and display it for each post
Our postcard will contain a title and short description, that we can find in the frontmatter of the markdown file. Additionally, it needs an URL to redirect the user to the right path on click. The URL creation will be explained in a later section.
// src/components/post-card.svelte
<script>
    export let title;
    export let description;

    export let url
</script>

<a href={url}>
  <article>
      <h1>{title}</h1>
      <p>{description}</p>
  </article>
</a>
Before requesting the posts dynamically we will create a dummy collection of posts in the script section of our index.svelte. Additionally, we will import the new component.
// src/routes/index.svelte
<script>
import PostCard from "/src/components/post-card.svelte";
let posts = [{title: "Post 1", description: "Short description 1", url: "/post1"},
{title: "Post 2", description: "Short description 2", url: "/post2"}]
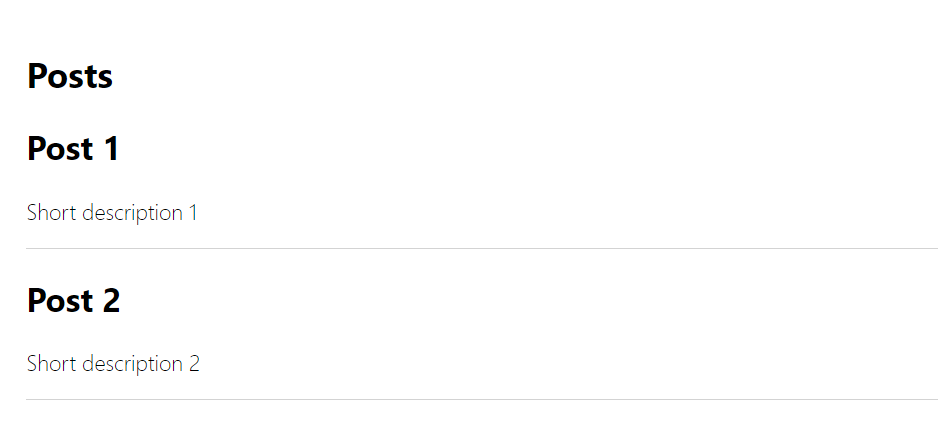
</script>To display the dummy collection, we will use a for-each loop inside of the HTML. With the following line, you create a PostCard component for each post in the dummy collection.
// src/routes/index.svelte
{#each posts as post}
    <PostCard {...post}/>
{/each}
The result looks like this:
Next, we will dynamically add new blog posts to the site. To do this we create our first endpoint. The endpoint will generate a list of all available blog posts with the functions defined in handle-markdown.js. As a result, we get a list of objects that will be converted into the format needed for the postcards.
For that, we will add the index.json.js endpoint into the src/routes directory.
// src/routes/index.json.js
import { importMarkdowns, convertToPostPreview } from "$lib/handle-markdown"

// load all markdown files from the posts directory
let postFiles = importMarkdowns("src/posts/")

export function get() {
    // convert the markdown to the required format
    let posts = postFiles.map((file) => convertToPostPreview(file));
    // stringify to give it as a result of the get command
    let body = JSON.stringify(posts);

    return {body}
}
To convert the JavaScript Object into the right format we will create a new function. For now, it adds a generic URL and brings the old object into a flat hierarchy.
// src/lib/handle-markdown.js
export function convertToPostPreview(object) {
    const url = object.path;

    return {...object.attributes, url};
}
To request data from the endpoint, we have to add a script tag with the module context. There we will call the load function that requests the data with a fetch function and assigns it to the variable.
// src/routes/index.svelte
<script context="module">
  // load data
  export async function load({fetch}) {
    // request data from endpoint
    const posts = await fetch("/index.json").then((r) => r.json())

    // assign it to the variable
    return {
        props: {posts}
    }
  }
</script>

<script>
  import PostCard from "/src/components/post-card.svelte";
  export let posts;
</script>
After successfully applying these steps you can create some markdown files in the src/posts/ directory. Every file needs to have a frontmatter containing a title and a description. Afterward your page will dynamically load the new files. If this is not working immediately you have to restart the development server.
The dynamically loaded post should look like this:

Create routes and load posts
After successfully loading posts on the main page, we also want to read the written post. Therefore we need to create a dynamic route that loads a post. To create the URL for the route we will modify the function convertToPostPreview(object).
// src/lib/handle-markdown.js
export function convertToPostPreview(object) {
    const url = object.path.replace(".md","").replace("src/", "");

    return {...object.attributes, url};
}
Because every post has a different name, we will create a dynamic page with [variable].svelte in the src/routes/posts directory. The part in brackets is used as a variable to request the needed file and display the content in the HTML of the page.
// src/routes/posts/[url].svelte
<script context="module">
    export async function load({fetch, page}) {
      // request post from [url].json.js endpoint
      const post = await fetch(`/posts/${page.params.url}.json`).then((r) => r.json())

      return {
          props: {post}
      }
    }
</script>

<style>
    :global(article) {
        padding: 4vw;
    }
</style>

<script>
    export let post;
</script>

<article>
    <h1 class="section-header">{post.attributes.title}</h1>
    // display HTML parsed content as HTML
    {@html post.html}
</article>
Additionally to the page, we need an endpoint to get the content for the load method. Therefore we will create a variable endpoint [url].json.js in the same directory src/routes/posts/. The get function loads the post with the given page URL by utilizing the convertMarkdown(path) function. It returns an object with the attributes and the parsed HTML.
// src/routes/posts/[url].json.js
import { convertMarkdown } from "$lib/handle-markdown"

export function get({ params }) {

    const {url} = params;
    const post = convertMarkdown(`src/posts/${url}.md`)
    let body = JSON.stringify(post);

    return {body}
}
Now we can click on the postcard and get redirected to the post. The post will contain the parsed content of the markdown file.
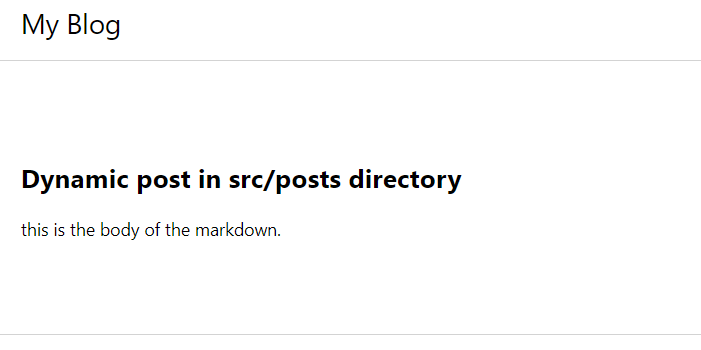
---
title: Dynamic post in src/posts directory
description: First dynamic post
---

this is the body of the markdown.
On your website it will look like this:
Build your site with the node adapter
After finishing up your site there is one part missing to release it to the web. You have to build and deploy it. To make your life easier SvelteKit implemented adapters to adapt your build to the deployment environment of your choice. I will use the node adapter to deploy it as a basic node web server, but you can also choose options like the netlify or static adapters.
To use it you have to import the adapter package.
npm i -D @sveltejs/adapter-node@nextThen you have to edit the svelte.config.js to use the adapter.
// svelte.config.js
import adapter from '@sveltejs/adapter-node';

export default {
	kit: {
		adapter: adapter({
			// default options are shown
			out: 'build'
		})
	}
};
Afterward, you can build the website and run it with the following commands.
npm run build
node build
Get the perfect lighthouse score
After creating your website and publishing some posts you probably also want to know about the score of your website. A good indicator for this is the open-source tool Lighthouse. It will show you what you can do to get the highest score in 4 different topics: performance, accessibility, best practices, and SEO.
You can view Lighthouse by opening the browser’s dev tools. In this part, I will show you how I optimize the score and get a ranking of 100% in each of the four categories. This can look different on your site, so you will just get an insight into how I accomplished the perfect lighthouse score.
Our current state is already near perfect in every category:
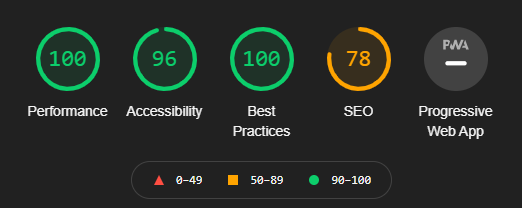
The first category already has a perfect lighthouse score by utilizing the SvelteKit technology. In the second category we are near 100%, but we are missing the title tag that every web page should have. It is the name that will be displayed on Google and in your browser tab. To implement it with Svelte we just need to add a title in the svelte:head tags.
// src/routes/index.svelte
<svelte:head>
    <title>My Blog</title>
</svelte:head>

// src/routes/posts/[url].svelte
<svelte:head>
    <title>{post.attributes.title}</title>
</svelte:head>
The category best practices have 100% as well. In the SEO category, we are missing a description, that can be also be added in the svelte:head tags.
// src/routes/index.svelte
<svelte:head>
<title>My Blog</title>
<meta name="description" content="This is my personal blog created with SvelteKit!">
</svelte:head>
// src/routes/posts/[url].svelte
<svelte:head>
<title>{post.attributes.title}</title>
<meta name="description" content={post.attributes.description}>
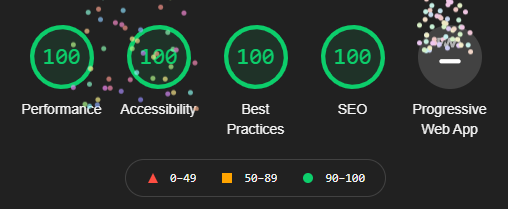
</svelte:head>After implementing these steps we have a perfect lighthouse score. As a bonus, we will receive fireworks.
For you, it could be more steps, but the lighthouse luckily will show you how to fix them most of the time.
After implementing this guide you should have a working website with a connected blog. Now it’s your time to shine! Create your personal website with a unique look.
Thank you for reading my guide. If you have any questions feel free to shoot me an email at mail@programonaut.com and I will try to help you!
You can find the project files on GitHub.
Discussion (10)
Related Posts