Host Your Web Application For Free With Render (step-by-step)
Do you want to learn how to host your next web application for free with Render? In this post, you will learn what is required to host your site, and then I will show you how to step-by-step!
In this post, we will cover the following topics:
- What is Render?
- Some questions regarding Render
- How to host your application for free with Render?
- Conclusion
What is Render?
Render is a unified cloud to run all your apps and websites. It offers free tiers for all web services and static sites. The hosting of a new app is really intuitive through a great UI.
Some questions regarding Render
What can you host with Render and what not?
Render allows you to host both dynamic and static sites.
How is the URL of your final site structured?
The URL structure is: https://<project-name>.onrender.com
If this guide is helpful to you and you like what I do, please support me with a coffee!
Can you use a custom domain?
Yes, for in-depth instructions, check here.
What state does the repository have to be in (Github)?
The repository can be either private or public. In addition to GitHub and GitLab, you can import every publicly available repository.
Which requirements apply to using Render for free?
You can use any project with Render (commercial and non-commercial). You just have to comply with the limits that you can find here.
What happens when you exceed the free plan limits?
I do not fully understand this part on their website, so read yourself here. My understanding is that for web service the service will just be shut down and for static sites, you will be charged for everything that exceeds.
How to host your application for free with Render?
To host a web application with Render for free, you can either immediately host a static or dynamic site. For the first example, we will host the static website we created here, and for the dynamic site, I will use my Tool Easy Portfolio (Svelte application build with node adapter).
Static Site
- Create a new static site
- Give Access to GitHub your Account and all or just selected repositories
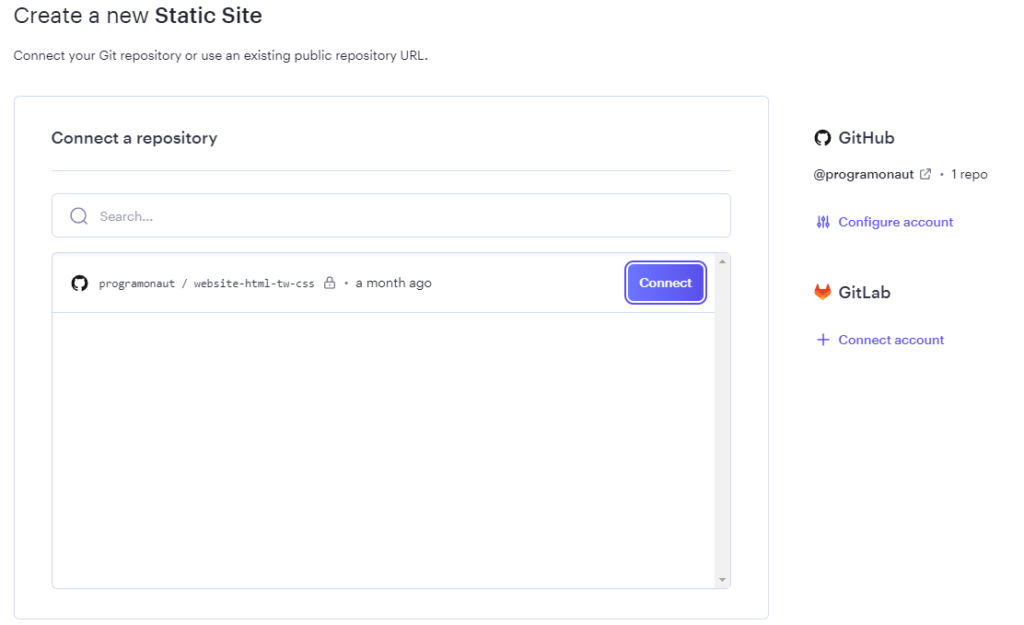
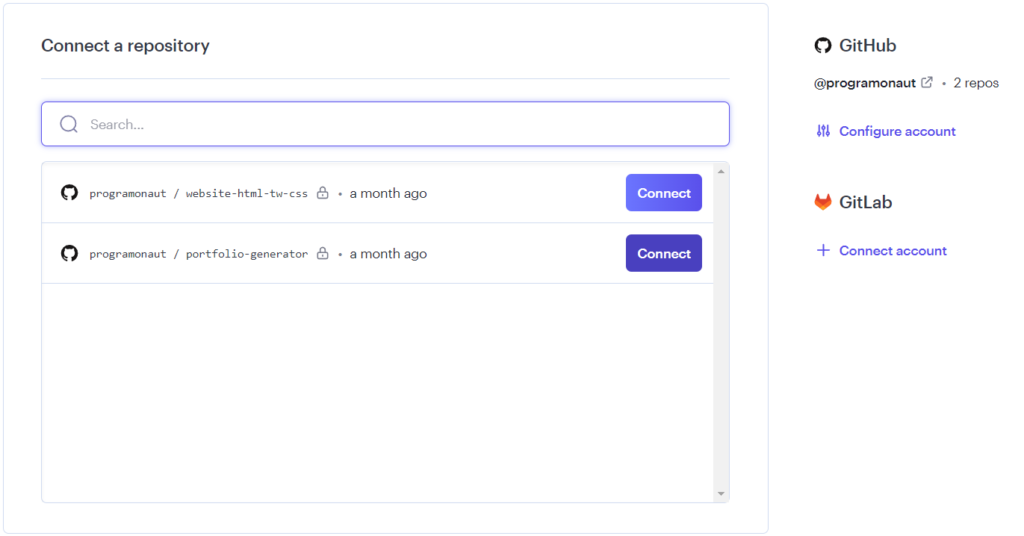
- Select repository in the “Connect a Repository” list
- Configure settings
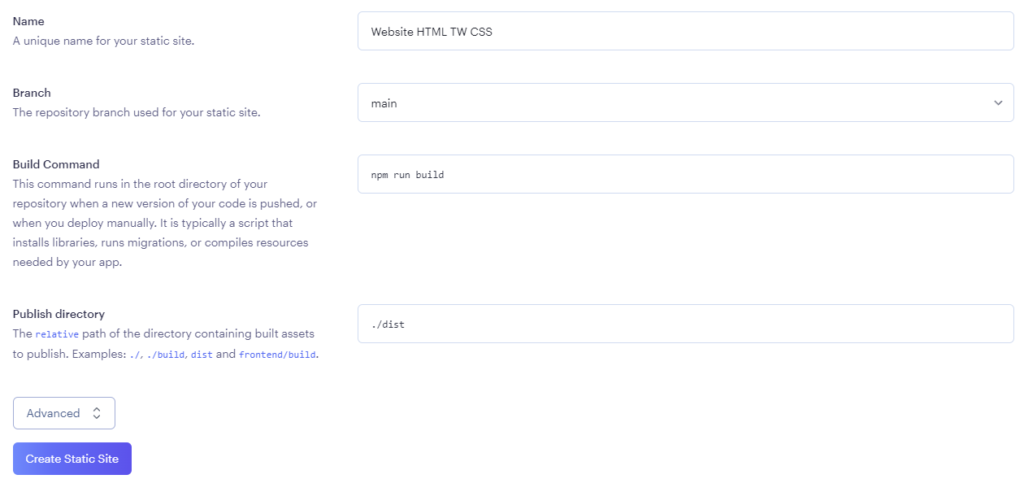
- Submit configuration
You can view the generated site on https://<project>.onrender.com.
Dynamic Site
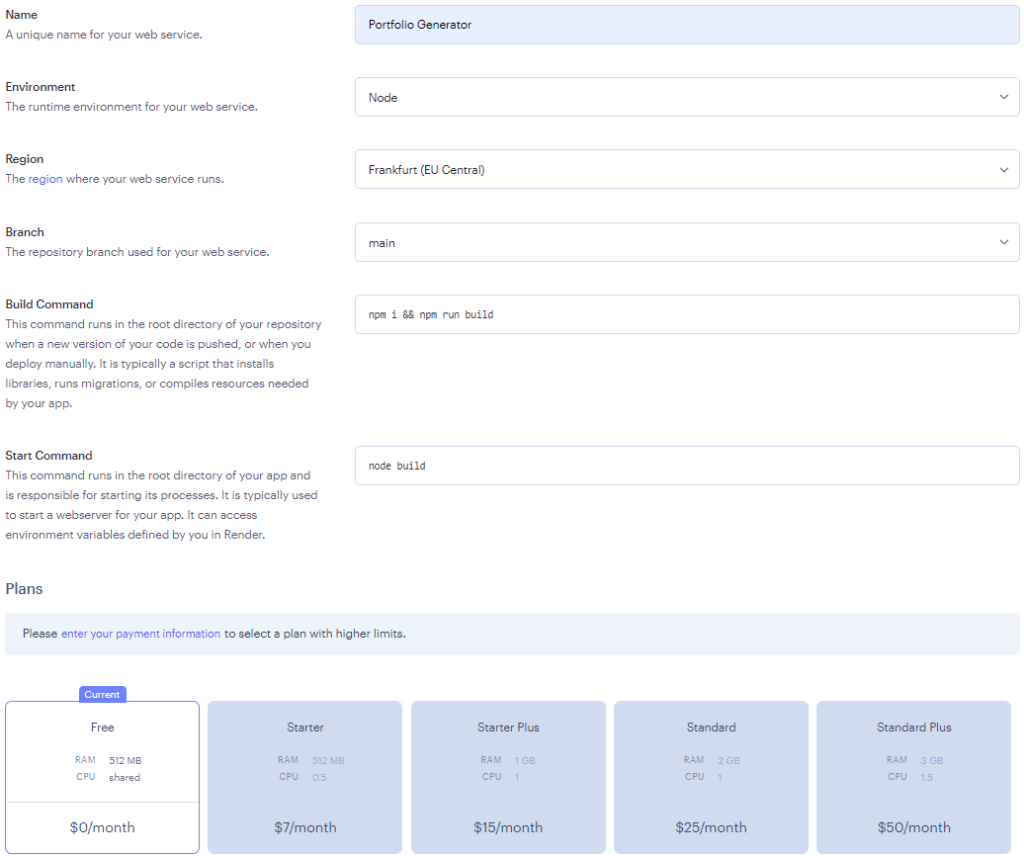
- Create a new Web Service
- Give Access to GitHub your Account and all or just selected repositories
- Select repository in the “Connect a Repository” list
- Configure Settings
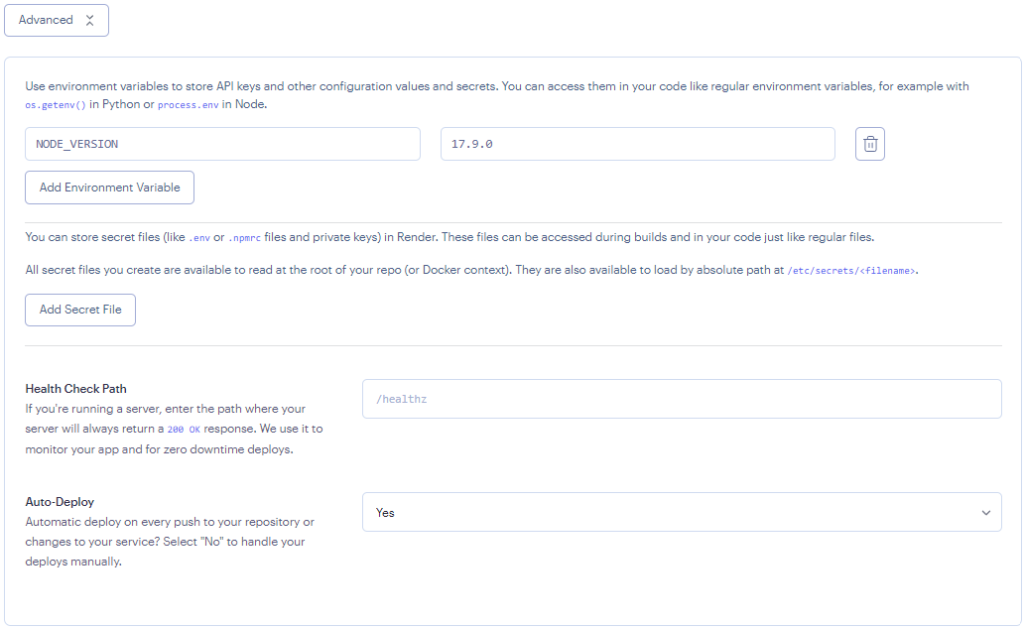
- Go on advanced and define Environment Variables for your Application (Svelte needs a Node Version >= 16.5, so I set the Render Node Version with the NODE_VERSION=17.9.0 Environment Variable)
- Submit configuration
You can view the generated site on https://<project>.onrender.com.
Conclusion
In this post, we learned how to use Render to host a static site or a web service for free. The cool thing about render is that it has a really intuitive UI that enables you to quickly bring your website online!
Did you use Render already? Share your experience in the comments below!
In case you got some questions regarding this post or anything else regarding your projects, feel free to ask! I would love to help you 🙂
And lastly, if you liked this blog post, consider subscribing to my newsletter. In it, I send a monthly update on all the posts I created!
[convertkit form=2303042]
Discussion (1)
Related Posts