How to create a download for a zip file with SvelteKit (step-by-step)
Do you want to learn how to download a zip file that you generate on a SvelteKit server (endpoint)? In this post, we will have a look at how exactly you can do that. I ran into this problem myself, and it took a while to figure it out. Thus I hope it will help you!
After reading and following the steps presented in this guide, you will have a SvelteKit application that takes an image link as an input, downloads the image, and generates a zip file from it (that will be downloaded to your system).
Project Preparation
In case you already have a SvelteKit project, you can skip this step. In it, we will create a new project and use it as a base for the guide.
We can create a new project by using the following commands:
npm init svelte@next zip-download
cd zip-download
npm install && npm install jszip
npm run dev
After the first command, you have to select some configurations. For this guide, I will use the following:
- Skeleton Project
- TypeScript: No
- Add ESLint: No
- Add Prettier: No
- Add Playwright: No
This will then create a new project, and the following command will install the required packages and run a dev server.
Now we can go to http://localhost:3000 to check if the SvelteKit Project is running.
If this guide is helpful to you and you like what I do, please support me with a coffee!
After that, we will remove the contents of the src/routes/index.svelte file. With that, we finished the project setup and can begin with the guide on downloading a zip file with SvelteKit.
Setup a Zip Download for SvelteKit
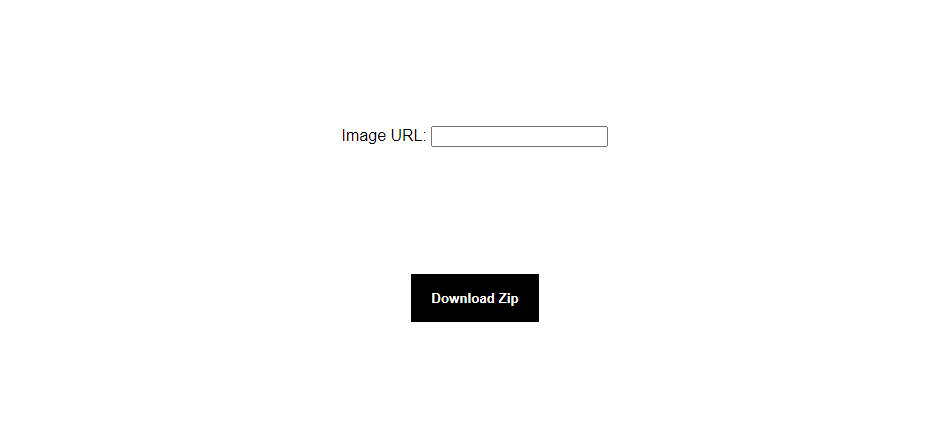
Before starting to implement the logic, let’s first create the visuals. For that, I want an URL input field (used for an image link) and a button that executes the download for us:
<script>
    let img;
    async function download() {}
</script>

<div class="button-container">
    <div>Image URL: <input type="url" name="image-url" bind:value={img}></div>
    <button on:click={download}>Download Zip</button>
</div>

<style>
    .button-container {
        position: absolute;
        top: 0;
        left: 0;
        width: 100vw;
        height: 100vh;
        display: flex;
        flex-direction: column;
        justify-content: space-evenly;
        align-items: center;
        font-family: sans-serif;
    }

    .button-container > button {
        width: 128px;
        height: 48px;
        background-color: black;
        color: white;
        font-weight: bold;
        border: none;
    }

    .button-container > button:hover {
        background-color: white;
        color: black;
        outline: black solid 2px;
    }
</style>
As a result, we have the following basic visuals:
With them in place, we can start building out the logic. As a quick reminder for the code above: bind:value={img} binds the value of the input field to the variable img (declared in the script tags) and on:click={download} will execute the function download (also declared in the script tags) when the user clicks the button.
Inside the download function, we will send an HTTP Request to an Endpoint, and inside of the endpoint, the zip file is generated and then sent back to the client. To create that, we first need to create a new endpoint /download. So, let’s create a new file src/routes/download.js representing the endpoint.
Inside the endpoint, we can define the types of requests we want to listen to. In this case, we have two options. We can listen for an HTTP GET (when we don’t have much data to send to the client) or an HTTP POST (when we need a lot of different and big data). In the GET request, you can only send data inside the URL’s query parameters. With the POST Request, you can also append data with the body. I will show you how both work, but let’s start with the GET for now.
Download a zip file with HTTP GET
Before we implement stuff in the endpoint, let’s first send the request on a button click. Therefore we add the following code inside of the download function:
async function download() {
	// get zip file from endpoint
	let res = await fetch(`/download?img=${encodeURIComponent(img)}`, {
		method: 'GET',
	});

	// convert zip file to url object (for anchor tag download)
	let blob = await res.blob();
	var url = window.URL || window.webkitURL;
	let link = url.createObjectURL(blob);

        // generate anchor tag, click it for download and then remove it again
	let a = document.createElement("a");
	a.setAttribute("download", `image.zip`);
	a.setAttribute("href", link);
	document.body.appendChild(a);
	a.click();
	document.body.removeChild(a);
}
The function does the following steps:
- Request the zip file and provide an image url
- Wait till the zip file is generated and sent back
- Convert zip to object URL
- Create anchor tag (with download functionality), click it, and remove it again (this starts the download of the returned file.
With this in place, we can start creating the backend logic. First, inside the endpoint, we read out the image URL, then download the image, zip it, and send it back to the client who requested the file.
import JSZip from 'jszip';
export async function get({ url }) {
const imgurl = url.searchParams.get('img');
const zip = new JSZip();
const image = await (await fetch(imgurl)).arrayBuffer();
zip.file('image.png', image);
let gen = await zip.generateAsync({ type: 'uint8array'})
return {
status: 200,
headers: {
"Content-Type": "application/zip",
"Content-Disposition": "attachement; filename=dummy.zip"
},
body: gen
}
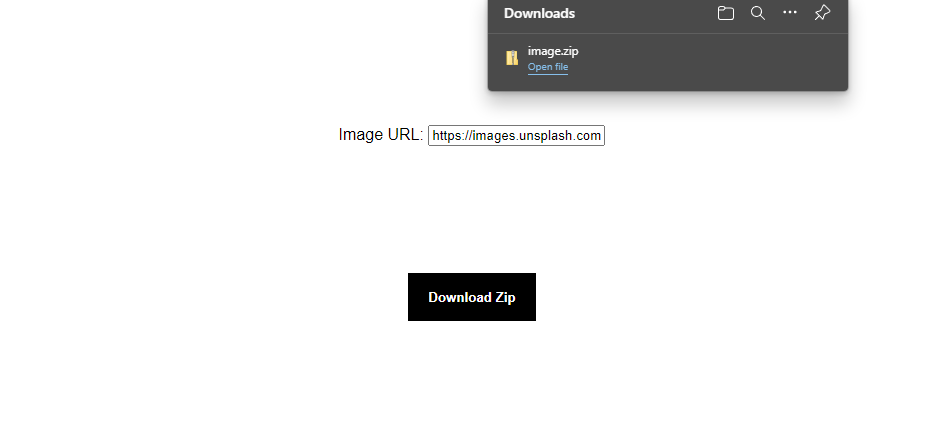
}Now we can fill an image URL into the input field and then click download zip. With that we get a zip file downloaded.
Download a zip file with HTTP POST
Now let’s look at how to do that with a POST request. Here we can append the data we want to send inside the body instead of the query parameters. One use case where I needed this was when a user uploaded an image, and I wanted to send this image to include it in the zip file.
For the post request we have to update the download function as follows:
async function download() {
	const data = {"img": img};

	let res = await fetch('/download', {
		method: 'POST',
		body: JSON.stringify(data)
	});

	let blob = await res.blob();
	var url = window.URL || window.webkitURL;
	let link = url.createObjectURL(blob);

        // generate anchor tag, click it for download and then remove it again
	let a = document.createElement("a");
	a.setAttribute("download", `image.zip`);
	a.setAttribute("href", link);
	document.body.appendChild(a);
	a.click();
	document.body.removeChild(a);
}
The only difference is in how we send the request. The next step is to update our endpoint. Here, we will now listen for a post request, and instead of just reading the URL, we need to retrieve the data from the request body. The zip generation still works the same.
export async function post({ request }) {
    const data = JSON.parse((await request.body.read()).toString());

    const zip = new JSZip();
    const image = await (await fetch(data.img)).arrayBuffer();

    zip.file('image.png', image);

    let gen = await zip.generateAsync({ type: 'uint8array'})

    return {
        status: 302,
        headers: {
            "Content-Type": "application/zip",
            "Content-Disposition": "attachement; filename=dummy.zip"
        },
        body: gen
    }
}
With that, we can now download a zip file that was generated inside a SvelteKit Endpoint by sending an HTTP GET or POST request.
Conclusion
In this guide, we learned how to download a zip file generated inside a SvelteKit Endpoint. In short, these are the steps we have to complete for that:
- Create download button
- Create endpoint
- Send POST Request on button click
- Generate zip (inside an endpoint)
- Return zip (from an endpoint)
- Retrieve zip and download through generating an anchor tag
You can find the source files for this guide in this GitHub repository.
I hope the guide was helpful to you because I had some problems when I tried to do this. If you have any questions, feel free to leave a comment or send me an e-mail or a tweet.
Additionally, if you liked the post consider subscribing to my newsletter to get informed about new content!
[convertkit form=2303042]
Discussion (0)
Related Posts